In this new post I’m going to configure a VNet-to-VNet connection (Site-to-Site), to provide VPN access between two Azure Virtual Networks.
Connecting a virtual network to another virtual network (VNet-to-VNet) is very similar to connecting a virtual network to an on-premises site location, as in both cases you will use a VPN gateway to provide secure tunnel using IPsec/IKE. Therefore, even though I’m connecting two Virtual Networks (VNet1 and VNet2), I’ll treat opposite Virtual Networks as On-premises networks (I.e. VNet1 will see VNet2 as an on-premises network, and vice versa).

As you can see in the above figure, I am using network 192.168.10.0 for VNet1 and network 172.16.0.0 for VNet2.
So I will start the lab by registering two DNS servers (one for each Virtual Network). To do this click on the NEW button on the bottom left corner of your Azure portal (Classic portal), click on NETWOKR SERVICES, VIRTUAL NETWORK, and REGISTER DNS SERVER.

You can enter the NAME, DNS SERVER IP ADDRESS and select the Azure subscription you want to use. (Note that you can use different subscriptions for each DNS server, as you can connect two Virtual networks from different subscriptions and/or different regions). Then click on REGISTER DNS SERVER. In my case I named the DNS server for VNet1 as VNet1DNS with an IP 192.168.10.4 and for VNet2 as VNet2DNS with an IP 172.16.0.4. Note that I am using the forth IP for each DNS server, that is because Azure the first three addresses are reserved in Azure for internal use, therefore for the first Virtual Machine you create in the Network the default address assigned to it will be the forth address (192.168.10.4 in case of VNet1) which will match with the DNS server we created (this first VM I usually set it to be a Domain Controller).
Next, we need to create the Virtual Networks. Again click on the NEW button on the bottom left corner of your Azure portal, click on NETWOKR SERVICES, VIRTUAL NETWORK, and CUSTOM CREATE. The CREATE A VIRTUAL NETWORK windows will open.

On the Virtual Network Details page write the NAME of the Virtual Network, the LOCATION and select the Azure SUBSCRIPTION you want to use (same subscription you used for the DNS server VNet1DNS). Continue to the next page by clicking on the arrow on the lower left.

On the DNS Server and VPN Connectivity page, select the DNS server we registered previously (VNet1DNS). You do not need select the checkboxes for Point-to-Site or Site-to-Site connectivity. Continue to the next page.

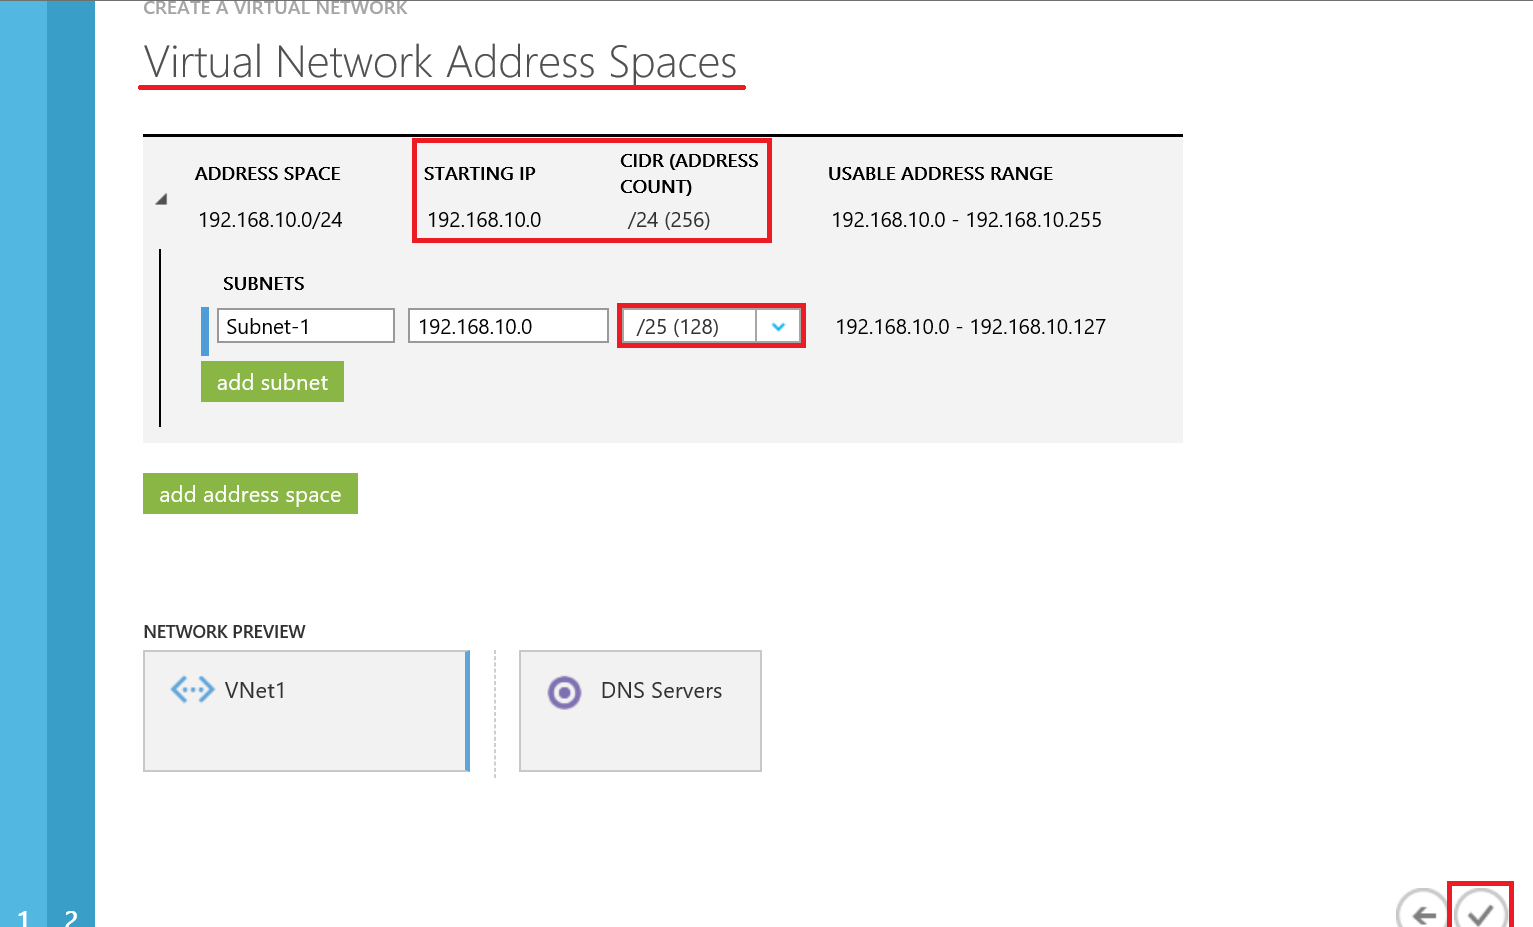
On the Virtual Network Address Spaces page, write the STARTING IP address (192.168.10.0 for VNet1) and select the CIDR (ADDRESS COUNT) prefix (I selected /24 for VNet1). I also changed the CIDR prefix for the Subnet-1 to /25. Click the checkmark to finish.
With the first Virtual network created we can repeat the same steps to create a second Virtual Network (VNet2). Write NAME, select the LOCATION and SUBSCRIPTION and continue to the next page.

Select the DNS we registered previously (VNet2DNS) and continue to next page.

Write the IP address for VNet2, 172.16.0.0/16 and for Subnet-1 172.16.0.0/24. Click the checkmark when done.

The next step is to create Local Networks Sites. Azure will use the settings that you specify in the local network site to determine how to route traffic between the Virtual Networks. As I mentioned before I will treat opposite networks as on-premises networks (VNet1 will see VNet2 as an on-premises network and vice versa), therefore the local network connected to VNet1 I’ll call it OnPremVNet2, and local network connected to VNet2 I’ll call it OpPremVNet1.
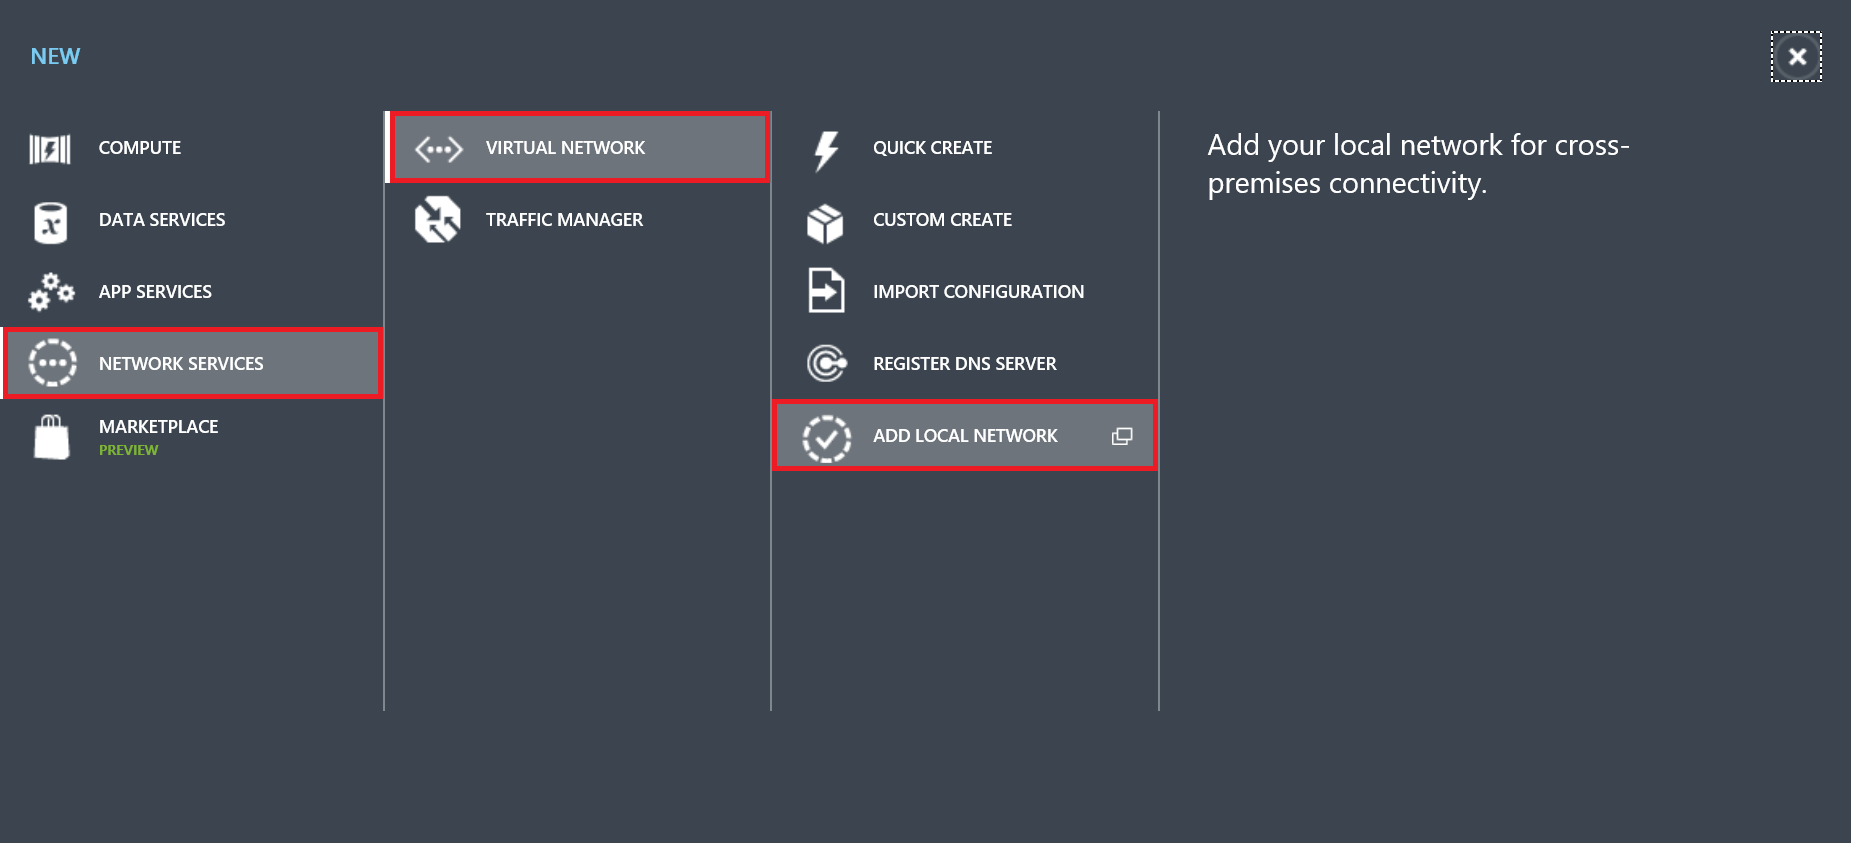
Once again click on the NEW button on the bottom left corner of your Azure portal, click on NETWOKR SERVICES, VIRTUAL NETWORK, and ADD LOCAL NETWORK. The ADD LOCAL NETWORK windows will open.
On the Specify your local network details page, write the NAME (OnPremVNet2). Then write a temporary VPN DEVICE IP ADDRESS, note that here we need to add the public IP address assigned to the gateway for of our Virtual Network, however as we haven’t created the gateway yet we can just use a temporary IP address, we cannot leave the IP in blank. Then select the Azure Subscription and continue to the next page.

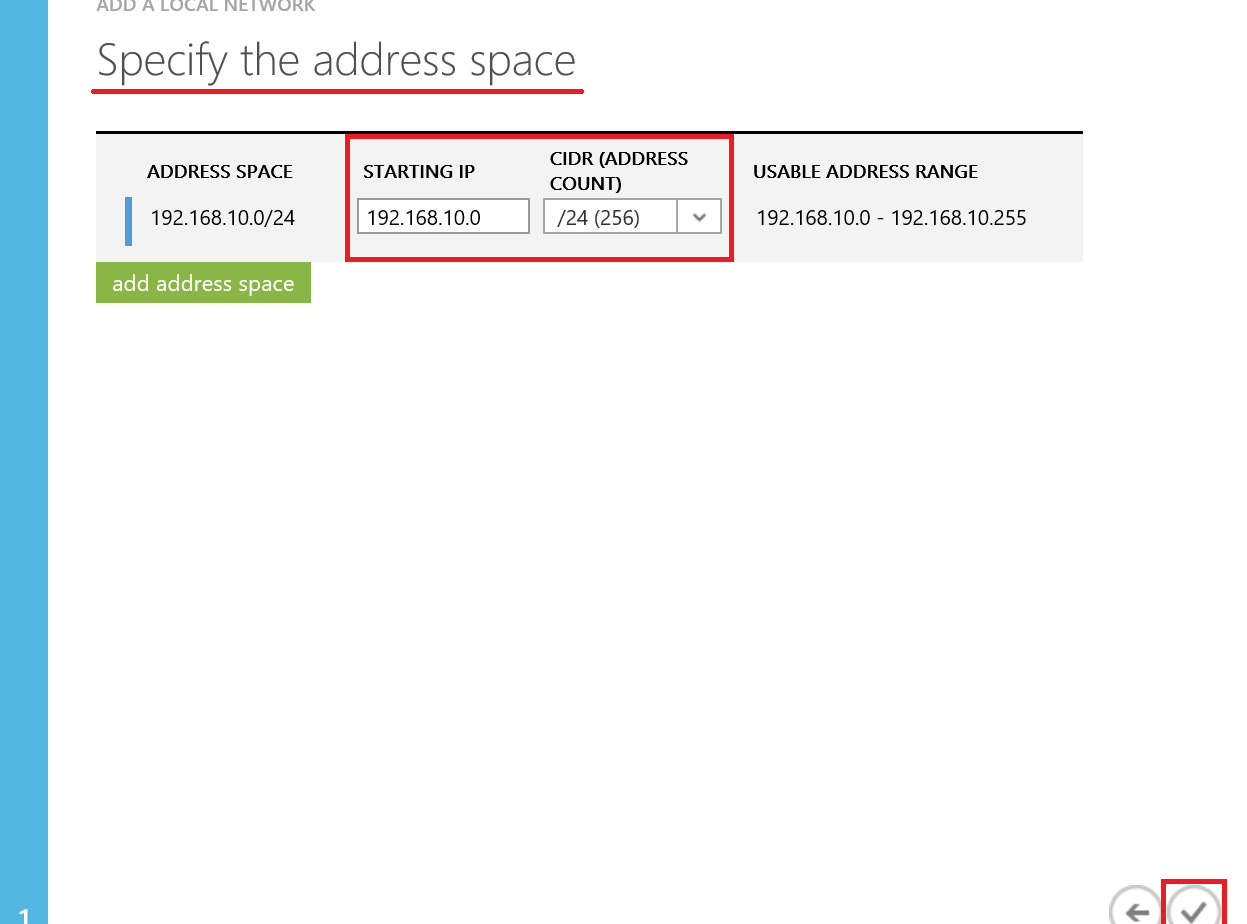
On Specify the address space page, write the same network you used for VNet2 (172.16.0.0/16), then click the checkmark to create the local network.

Repeat the same steps to create the local network that will be connected to VNet2. Write the NAME (OnPremVNet1), temporary VPN DEVICE IP ADDRESS, and subscription. Then continue to the next page

On the next page, specify the IP network used for VNet1 (192.168.10.0/24) and click the checkmark to finish. You can verify the creation of the local networks on the Azure portal, navigate to NETWORKS and click on the LOCAL NETWORKS tab.
With both local networks created, we now need to configure our Virtual Networks adding the local network to each. In your Azure portal, navigate to NETWORKS and on the VIRTUAL NETWORKS tab select VNet1. On VNet1, select CONFIGURE tab.

On the VNet1 configuration page, under site-to-site connectivity click on the Connect to the local network checkbox, and select the local network to which VNet1 will be connecting (OnPremVNet2). You will also notice that a new gateway was created in our virtual network address spaces. Save the changes.

Let’s repeat the same steps for VNet2. Navigate to VNet2 CONFIGURATION page, under site-to-site connectivity click on the Connect to the local network checkbox, select the local network to which VNet2 will be connecting (OnPremVNet1) and save the changes.

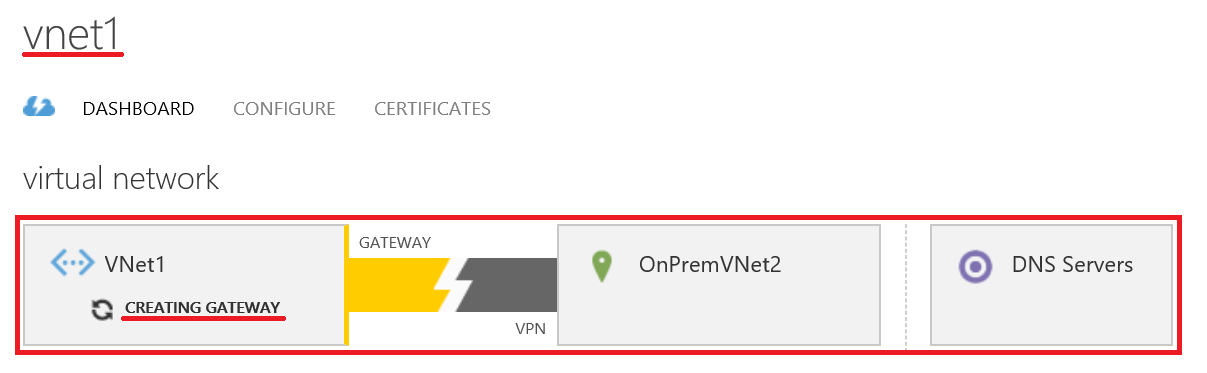
Navigate to the DASHBOARD of your Virtual Networks (VNet1 and VNet2). There you will notice that the Gateways were not really created.

To create the gateway, click on CREATE GATEWAY on the bar at the bottom center, and select Dynamic Routing. Note that Static Routing is not supported, so if you are using a virtual network previously created with static routing you will need to delete the gateway and create a dynamic gateway.

The creation of the Gateways will start. Repeat the same steps for the other VNet. (Do not worry if it is taking long, it took about 30min or more for the gateways to be created).

When the gateways get created, navigate to the DASHBOARD of each VNet and take note of the public IP assigned to each Gateway.


Next we need to replace the temporary IP addresses we assigned to the local networks with the gateway IP addresses. On the Azure portal navigate to NETWORKS and select the LOCAL NETWORKS tab, select the OnPremVNet1 and click on EDIT on the bar at the bottom of the page. On the VPN DEVICE IP ADDRESS of OnPremVNet1 write the Public IP address assigned to the Gateway of VNet1, continue to the next page, and click the checkmark to finish.

Repeat the same with the OnPremVNet2, there write the public IP address assigned to VNet2 gateway, continue to the next page, and click the checkmark to finish.

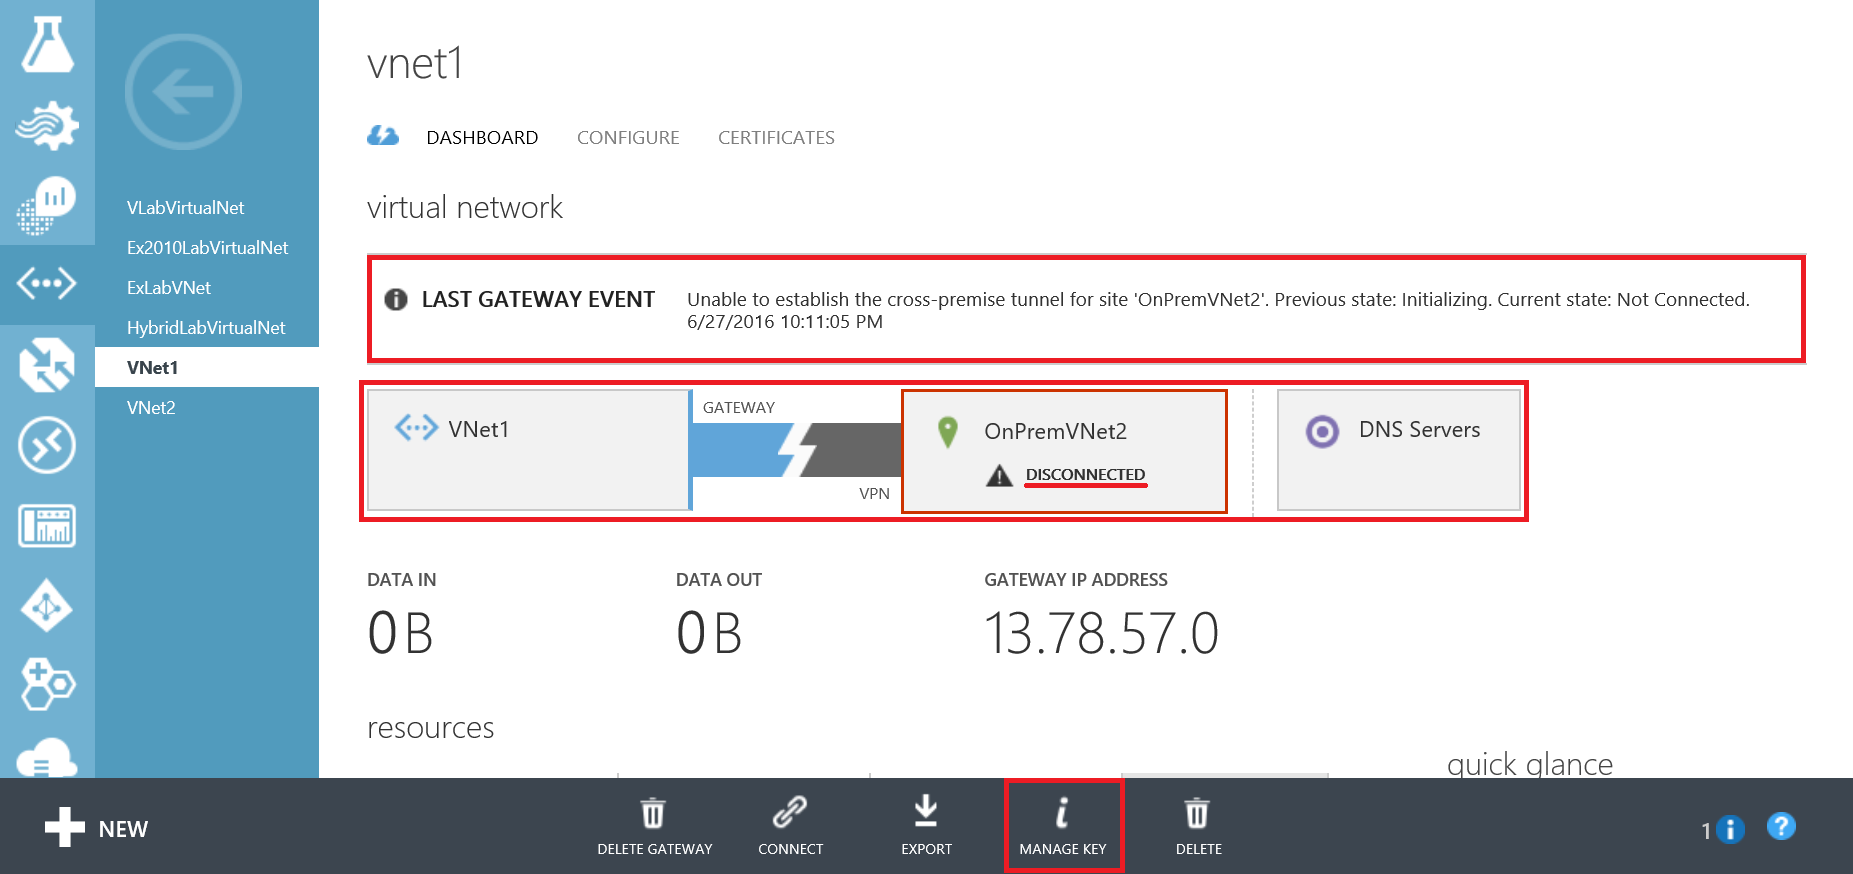
Back to the DASHBOARD of each VNet you will now notice that the Virtual Networks still unable to connect. This is because now we need to set the IPsec IKE pre-shared key to create the VPN connection. To create the Pre-shared key on the DASHBOARD of VNet1 or VNet2 (any of them will work), and click on MANAGE KEY on the bar at the bottom.
On the Manage Share Key page copy the key to your notepad and click on the checkmark.

To set the Pre-Shared key to both VNets and create the connection between Virtual Networks we need to use PowerShell as this steps cannot be done through the portal. Therefore open PowerShell as Administrator and connect to your Azure account.
Add-AzureAccount
Make sure you select the subscription you used for each VNet when following the next steps. You can review the steps for signing in and select Azure subscription in this post.
Then, let us create the connecting between VNet1 and OnPremVNet2. (Note the shared key XXXYYYYZZZZZAAAAA, is the key you copied on your notepad).
Set-AzureVNetGatewayKey -VNetName VNet1 -LocalNetworkSiteName OnPremVNet2 -SharedKey XXXYYYYZZZZZAAAAA
Then the connection between VNet2 and OnPremVNet1. (Using the same key)
Set-AzureVNetGatewayKey -VNetName VNet2 -LocalNetworkSiteName OnPremVNet1 -SharedKey XXXYYYYZZZZZAAAAA

After the VPN connection is created the DASHBOARD for each VNet will look as follow:


Congratulations!! You just set your VNet-to-VNet connection.
To test connectivity between VNets, I created a Virtual Machine in each Virtual Network VNet1VM on VNet1 and VNet2VM on VNet2 (as showed in the figures above).
Connect to your VMs, ad check the IP configuration of each.


For the Ping test to be successful we need to enable ICMP Echo messages on both Virtual Machines.

Finally use PowerShell to test connectivity by pinging the Virtual Machine on the other network.


[…] the New Portal from here on; if you want to try this steps on the classic portal you can find them in this blog). So first navigate to the Virtual network […]